After working on my Chromebook a few weeks ago, it’s time to turn to another Notebook that needs attention. A HP Spectre x360 was suffering from a dead battery. That means the notebook would shut down after a few seconds without power, even though it’s barely five years old. At this point it’s out of warranty so I decided to swap the battery myself.
Fortunately HP has a relatively detailed Service Manual that tells you where the necessary screws and connectors are, the steps to open the machine and also the parts number of the battery (pages 24-26). This made things a lot easier.
Factsheet:
- Name: HP Spectre x360 Convertible
- Model No.: 13-ac076nr
- Battery Part No.: 859356-855
- Service Manual
To prepare for the repair, I checked the screws I’d need screwdrivers for, here’s the list:
- Phillips PM2.0 x 5.0
- Phillips PM2.0 x 3.0
- Torx T8M2.0×3.0
It took me a while to find a nice screwdriver set that contains the required drivers. I settled on a nice Wera set, which isn’t cheap but I expect it to last a long time (and who doesn’t like nice toys). Besides the tools the star of the repair would be the battery. I just googled for batteries compatible with the exact model number / battery part number and settled on a third party battery for around 45€. I didn’t feel like spending more than double that importing an original - a choice I hope not to regret in the future.
Next I had to wait a few days for things to arrive. Once I had assembled the pieces, I turned of the notebook, disconnected the power cable and turned it so the bottom cover was facing up. According to the service manual I had to remove the two feet closest to the hinges.
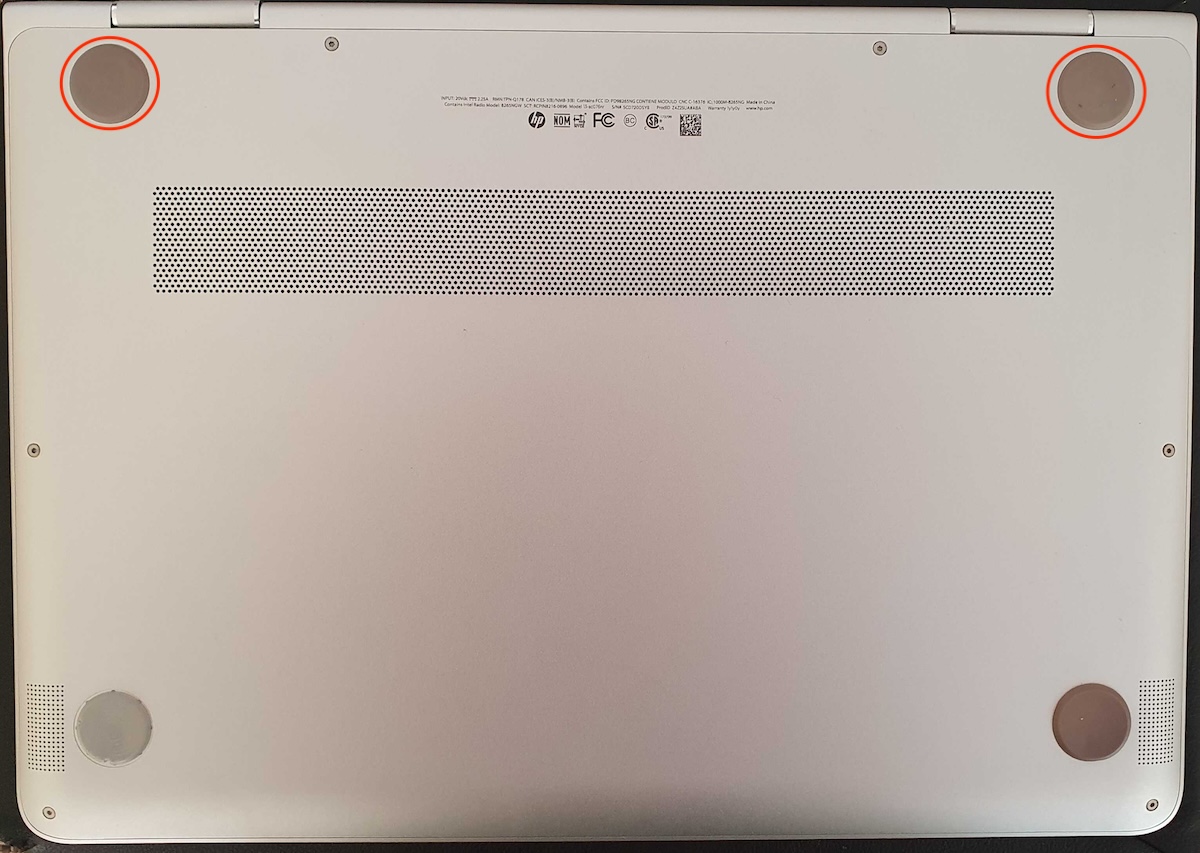
The foot that broke a few years ago (bottom left) led me to suspect trying to fit a blade underneath to lift it up carefully might be a way to go. That was mostly successful, one of the feet fell apart - nothing that a bit of glue can’t fix. I’m not sure if it’s the aging rubber that made this annoying but I think that’s only a part of it. There’s no good reason to hide screws under feed that are glued to the chassis.
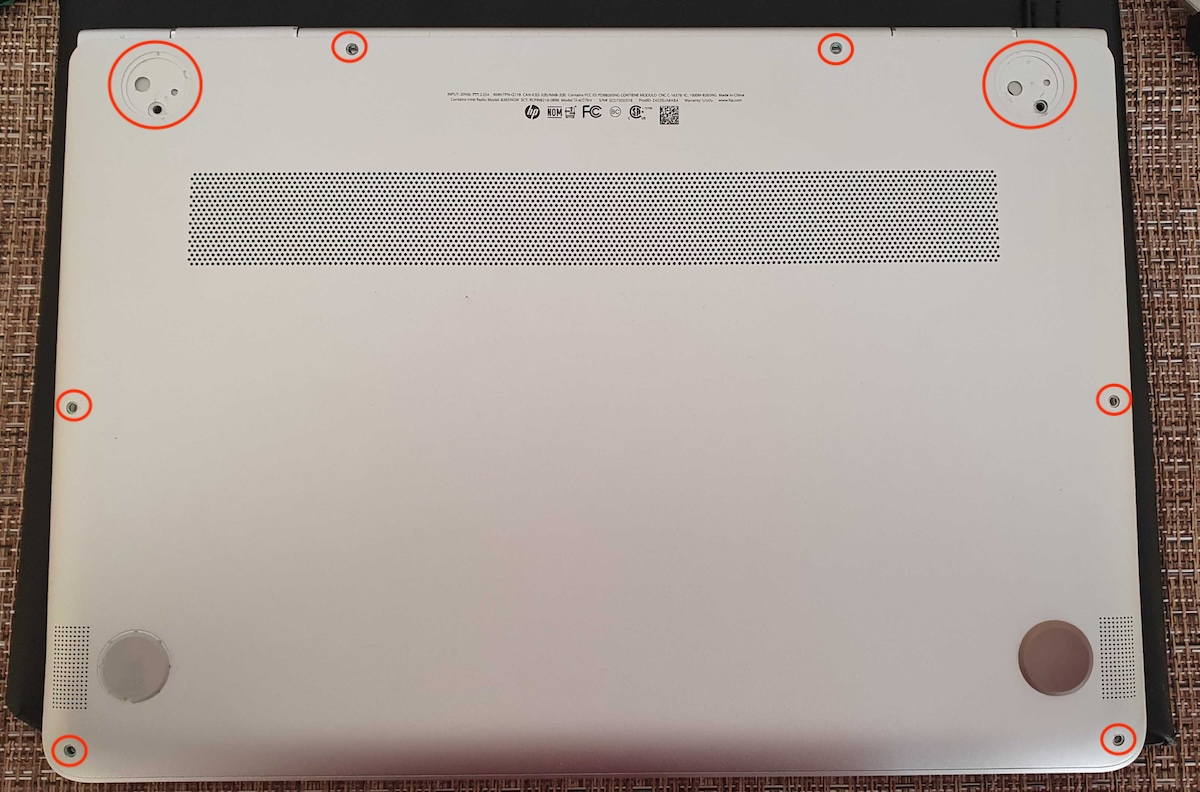
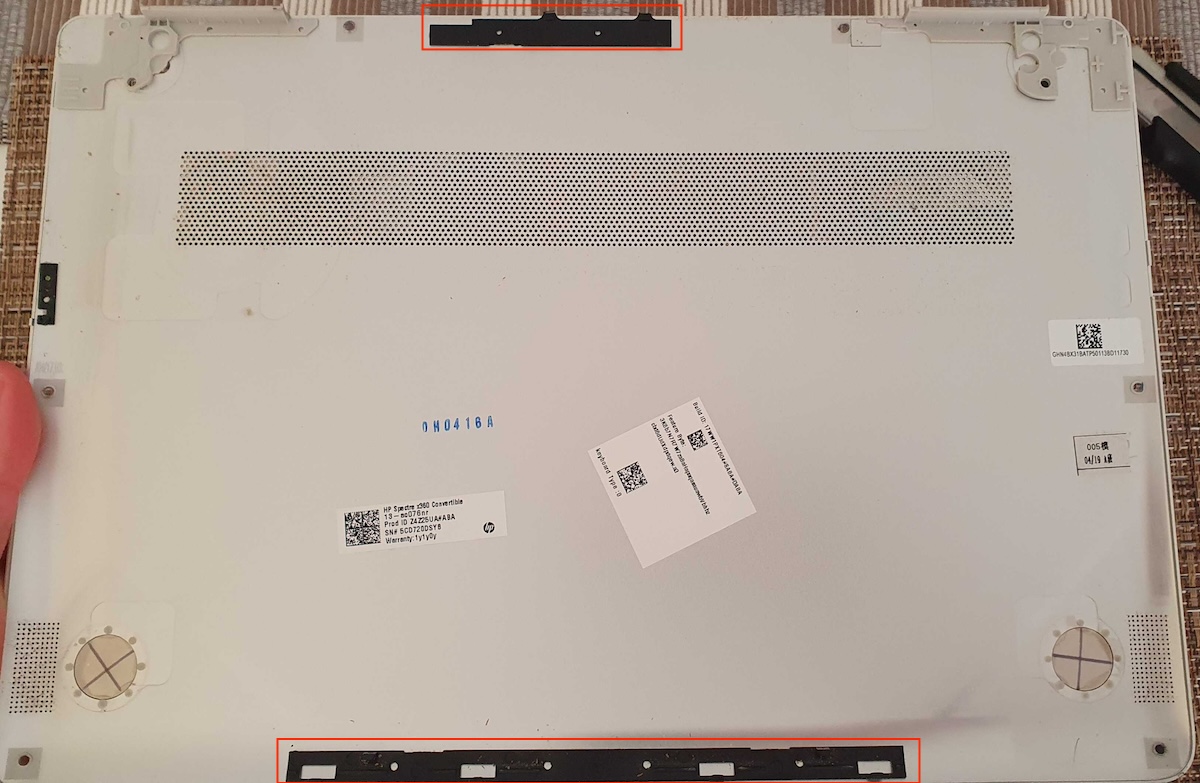
After removing the six Torx screws and two Phillips screws (under the feet) I was able to lift up the cover. At this point I should say that the Torx screws are really tiny and you’ll probably not have a bit or screwdriver lying around for these - check in advance. I worked my way around the bottom cover with tiny Flathead screwdrivers until I found the plastic clips and then lifted up the chassis. as you can see there are some plastic mechanisms to hold the back in place in case the eight screws aren’t enough. I hope HP had a good reason for that besides annoying people opening the machine.
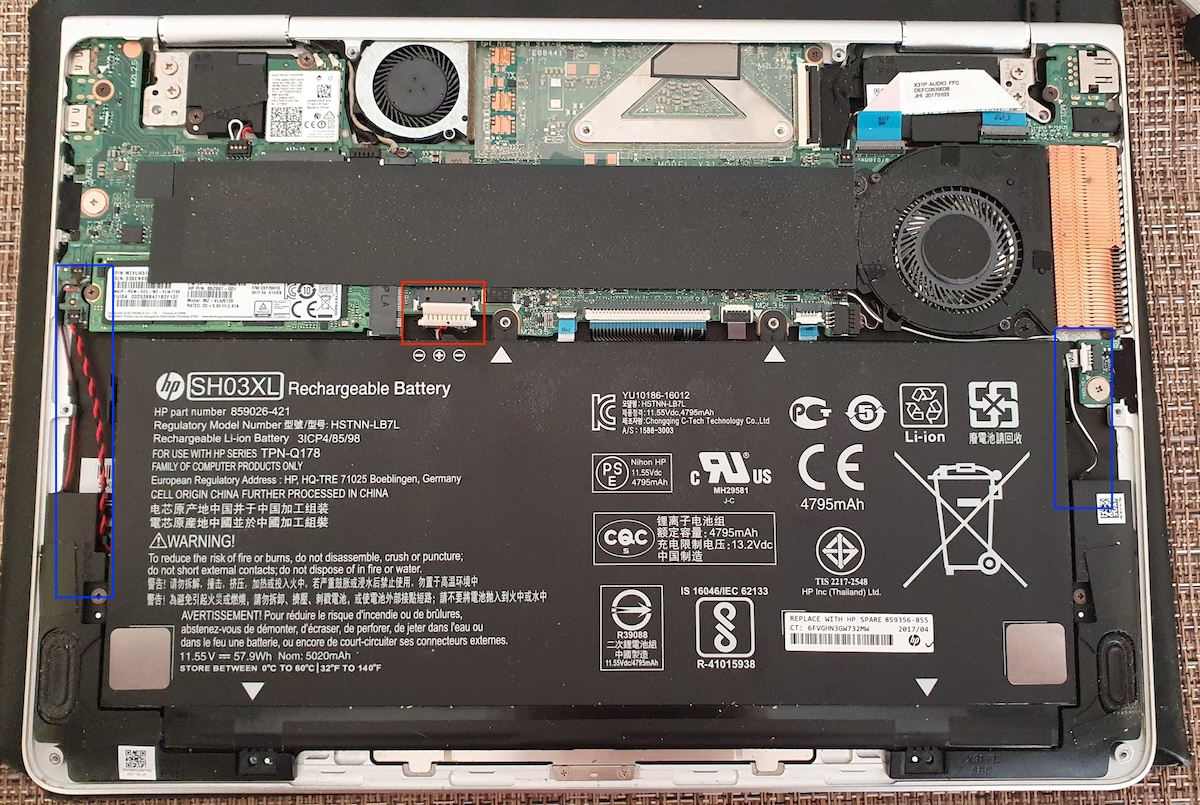
The next part was a bit finicky, but relatively easy. First I had to disconnect the battery and unscrew it. If you look at the notebook like this, the connector pins are visible - that helps to avoid plugging it in the wrong way (I didn’t try if it would even go in any other way, I wanted to avoid the magic smoke, other wise I’d get in trouble).
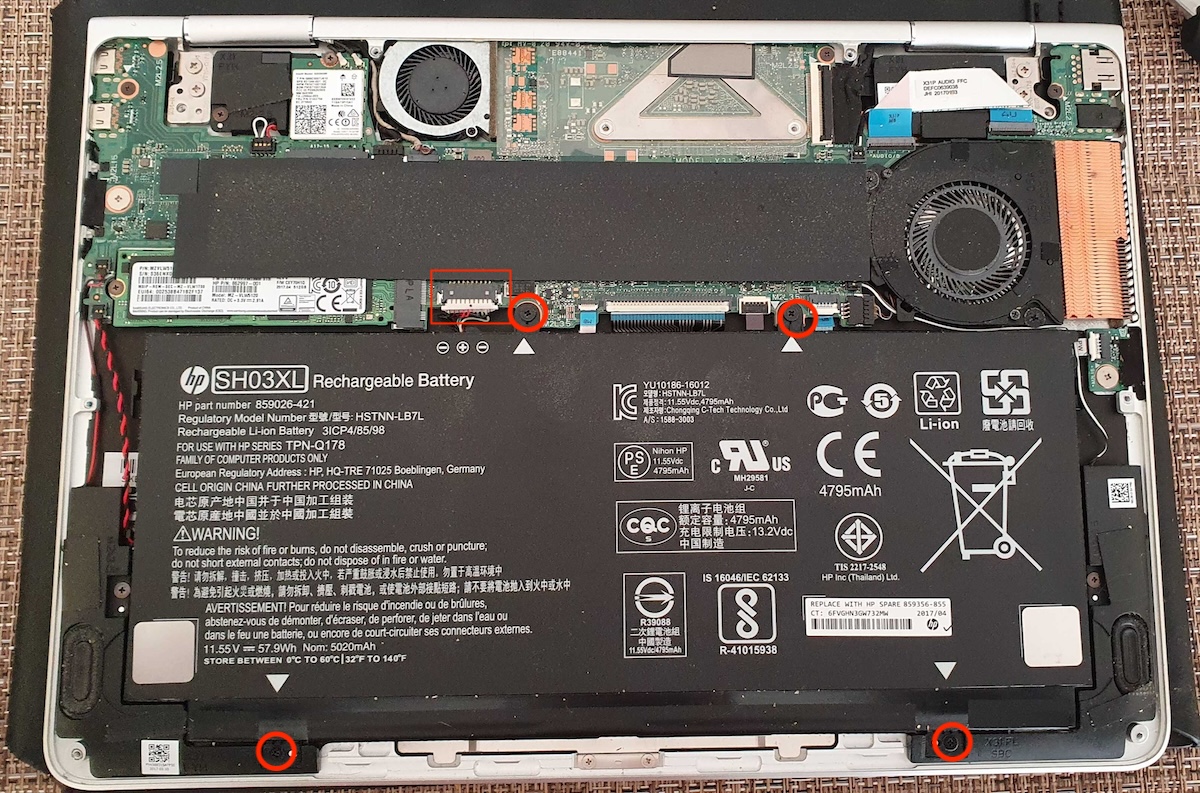
Once everything is disconnected, we can lift the battery - be careful with the thin cables to the left and right of the battery - they may be fixed to the battery or routed to the side of it and we want to avoid breaking them.
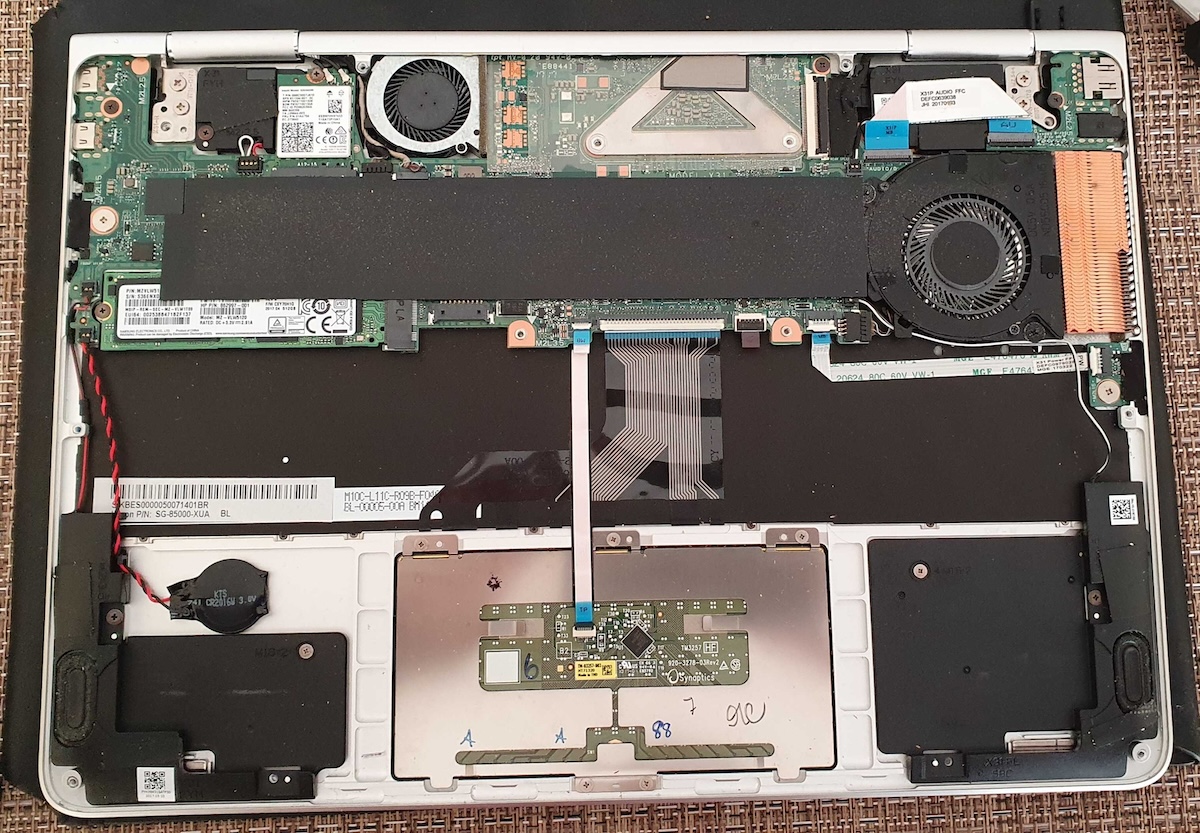
This is the notebook without it’s defective power source, there isn’t a lot of space to work with in terms of plugging in the new battery.
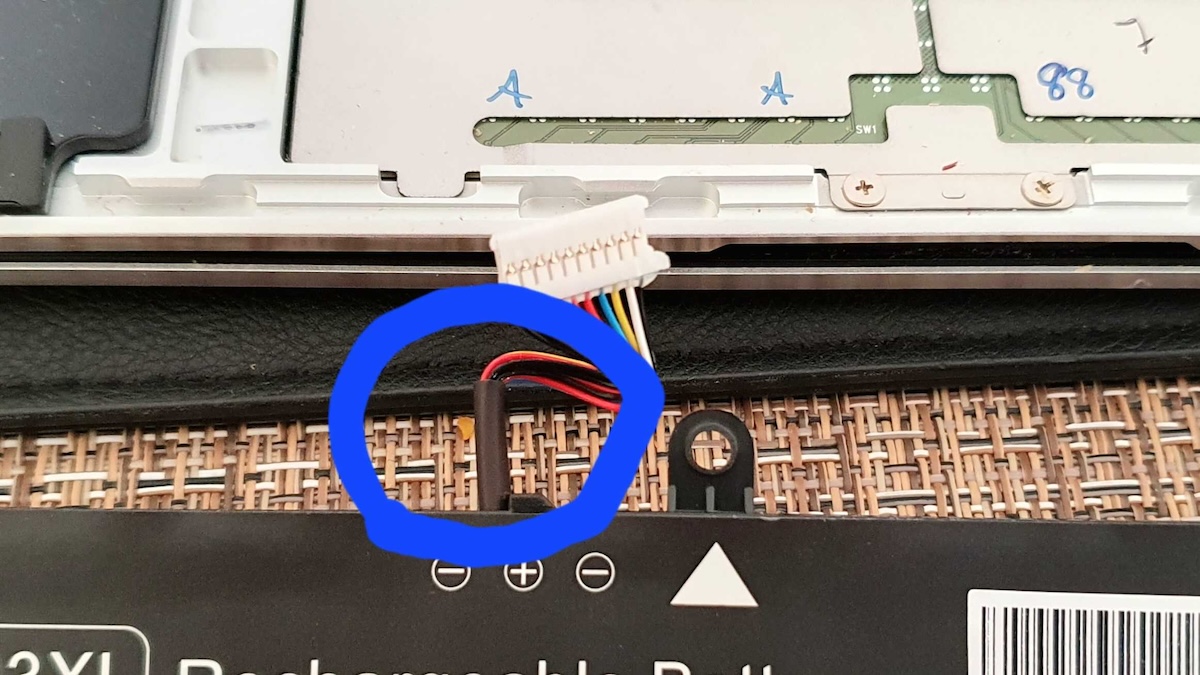
This turned out to be a small issue. The replacement battery had a plastic sleeve covering parts of the tiny cables sticking out of it. Unfortunately that wasn’t very flexible and I wasn’t able to plugin in and correctly position the battery. So I had to very carefully cut away a good chunk of that black sleeve without damaging the cables inside.
Once that was done, I was able to fit the battery, plug it in and screw it in place. I shoved most of the connector cable (gently) underneath the mainboard and everything fit. Since all cables are sleeved, I don’t expect any issues. In general the new connector cable is just slightly longer than the old one.
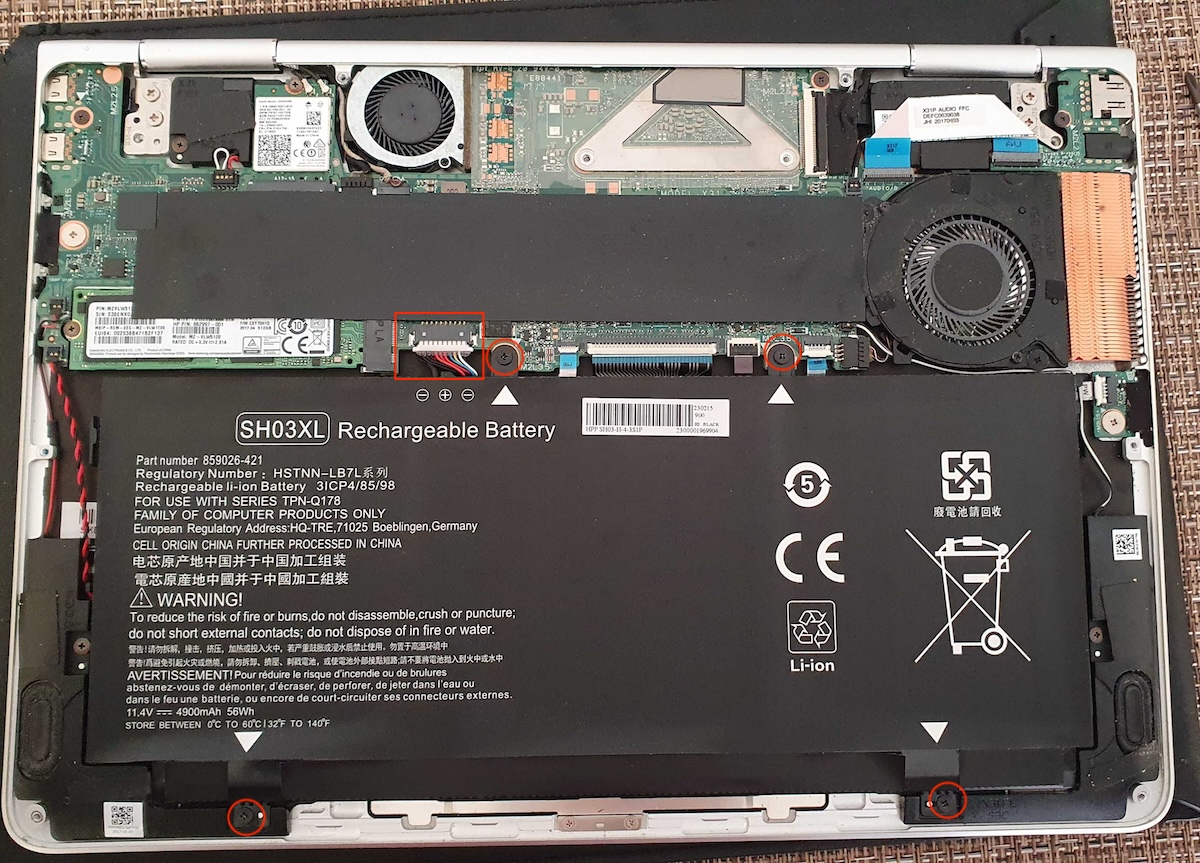
With the replacement done, it was time to retrace my steps and put everything back together before booting up the machine. I thought about trying it without the cover first, but I wasn’t sure if it would even let me boot it up. I had to apply a bit of force to fit the bottom cover into place - I may have damaged some of the plastic brackets when disassembling it. Then again, there are eight screws should be plenty to hold a thin sheet of metal in place.
The moment of truth was a bit anticlimactic, I plugged in the power cable because I wasn’t sure if the battery was already charged and it booted right up. The battery was already at 75% and after disconnecting the power cord the computer didn’t die - success!
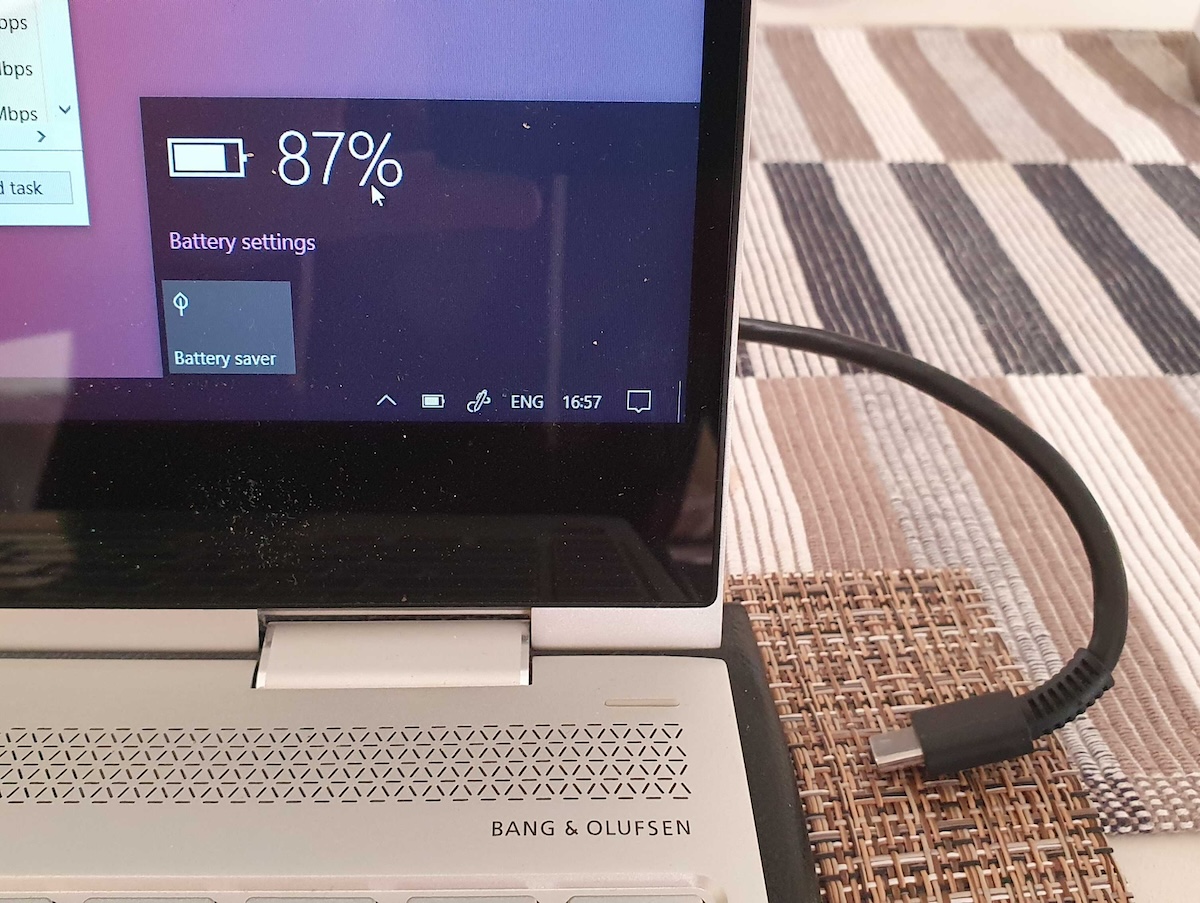
Curiously - or I guess not - the HP tools didn’t show a lot of information about the battery besides it capacity. I sort of expected this since it’s not a HP original. While writing this, the battery has charged to 100% and it seems like it will last a while. If not - now I know how to change it.
Looking back I’d say the experience of changing the battery was relatively good. The service manual explained all the steps and it’s not too complicated. I’m a bit annoyed about the hidden screws under the feet and these weird plastic connectors at the bottom of the cover. I don’t know nearly enough about anything related to product/hardware design, but it seems to me like these were steps take to discourage people from performing simple maintenance like this themselves.
At least the device wasn’t full of glue.
Not sure if there’s anything to learn from this unless you have this specific model of Notebook with a dead battery. I’d just encourage you to do your research, find the service manual and DIY (be careful, obviously).
— Maurice
