Introduction
Terminalizer allows you to record what’s happening in your terminal and then replay the recording, edit it or render it as a gif. In this post I’m first going to show you how to install it and then we’ll go through the workflow I described: Create a recording, replay it and render it. In the end I’m also going to give you a few tips with regards to editing the recording.
Installation
Terminalizer is based on Node.JS, so you need to install the node package manager (NPM) first - if you’re new to that, here’s the official guide on doing that for your platform.
After you’ve installed npm you can use it to install Terminalizer: npm install terminalizer - you can also install it globally using npm install -g terminalizer.
Depending on your platform you might need to prefix that with sudo.
I chose to install it locally, because I seem to have permission issues with the global installation of terminalizer.
If you installed Terminalizer globally, the following command should display the version you installed: terminalizer --version, for a local installation, it’s ./node_modules/.bin/terminalizer --version.
To make things easier, I’m adding the node_modules/.bin directory to my PATH environment variable so I can use the terminalizer command as well.
That’s pretty easy for the shell on unix based operating systems - just add PATH=node_modules/.bin:$PATH to your ~/.bashrc .
Let’s now have a look at the basic workflow with Terminalizer:
- Recording
- Replaying and
- Rendering
Recording
Starting a recording is very easy.
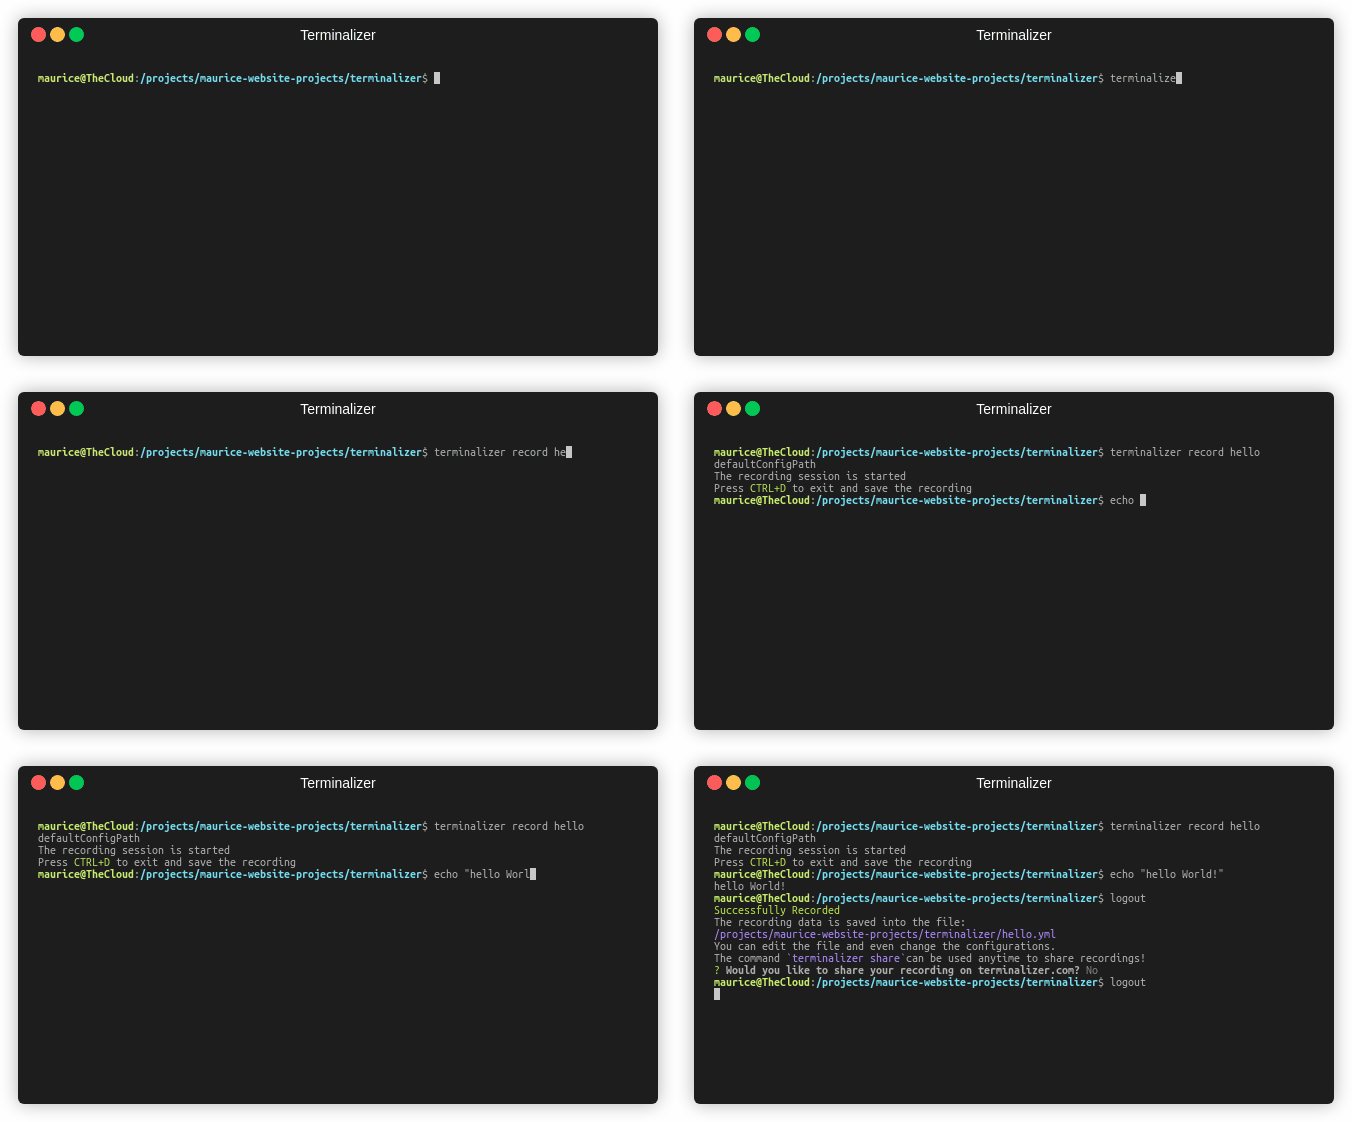
All we need to do beforehand is decide on a name for this recording and then run terminalizer record <name> in the terminal.
That will start a new shell inside your terminal and give you a hint on how to stop the recording.
Now you can do whatever you’d like to record inside your terminal - don’t worry about mistakes, you’ll be able to edit things later.
To stop the recording, you just hit Ctrl+D on your keyboard.
It will prompt you and ask you if you’d like to upload the recording to terminalizer.com, I usually enter n for no here (If you want to get rid of that prompt, you need to add the -k option to the command: terminalizer record <name> -k).
Upon stopping the recording you’ll be back in your original shell.
If you now enter ls you should see a new file with the name <name>.yml which holds your recording.

Replaying
To check out how your recording looks, you can replay it inside the terminal.
This is very simple as well, just enter terminalizer play <name> where <name> is the name of your recording or a path to its yaml file.
Terminalizer will then replay your recording.
You should be aware, that this doesn’t actually run the commands again, it just prints the output and keystrokes it had captured before.

Rendering
Your main intent of recording your terminal is probably to share it with others.
The most platform independent format that Terminalizer supports is an animated gif.
To convert your recording to a gif you just run terminalizer render <name> -o <gif-name> where <gif-name> is the path you want to store your gif in.
You can ommit the -o parameter - in that case Terminalizer generates a filename for you.
Note that depending on the length of your recording this may take a couple of minutes and the file size may grow significantly.

If your recording doesn’t entirely looks as you desired, there’s ways to edit it, which we’re going to take a look at next.
Editing
If you open <name>.yml with your text editor of choice (I’m not talking about Word or Google Docs here), you’ll find that the recording file comes with a lot of comments, which is really helpful.
The keys config.cols and config.rows control the size (as in height and width) of the rendered gif - I recommend you shrink this, so there isn’t too much empty space in your gif.
You might have to tinker with the settings here, depending on the kinds of commands and output you record.
Changing the title of the window in the gif can be done at the config.frameBox.title key and if you want, you can also customize the font size at config.fontSize - I usually increase this to 16.
Under the records key you’ll find a list of items that each have a delay and content key.
These are the inputs and outputs Terminalizer actually records.
The delay tells you how long Terminalizer waits before changing to this frame.
So if you had these entries, Terminalizer would wait 700 milliseconds after showing the t being entered until the e shows up.
records:
  - delay: 1824
    content: t
  - delay: 700
    content: e
There is an upper limit on this by default (2000ms), which is controlled by the config.maxIdleTime key.
This means if you execute a long running task, such as a benchmark that runs several minutes, the action will take at most 2000ms or two seconds in the recording.
You can also disable this, if you want to torture your viewers.
I usually edit the recordings here and remove typos in commands as well as reduce the delay between individual key strokes to about 50ms. I’ve found that varying the actual delay makes the recording seem less robotic here.
To locate typos I usually search for the backspace escape sequence, which is \b\e[K.
Here’s an example of that, where I typed echi and changed that to echo:
records:
  - delay: 1748
    content: e
  - delay: 220
    content: c
  - delay: 104
    content: h
  - delay: 56
    content: i
  - delay: 166
    content: "\b\e[K"
  - delay: 468
    content: o
Further Tips
Now you know enough to create basic recordings, replay them and render them to a gif. In this section I want to share some additional tips with you.
You can create a global configuration which will be the basis for your recordings by running terminalizer init.
On linux this will create a default configuration in ~/.terminalizer/config.yml which you can edit.
Here you can overwrite any of the defaults for recording.
That way you won’t have to edit the columns and rows or font size for any new recording you create.
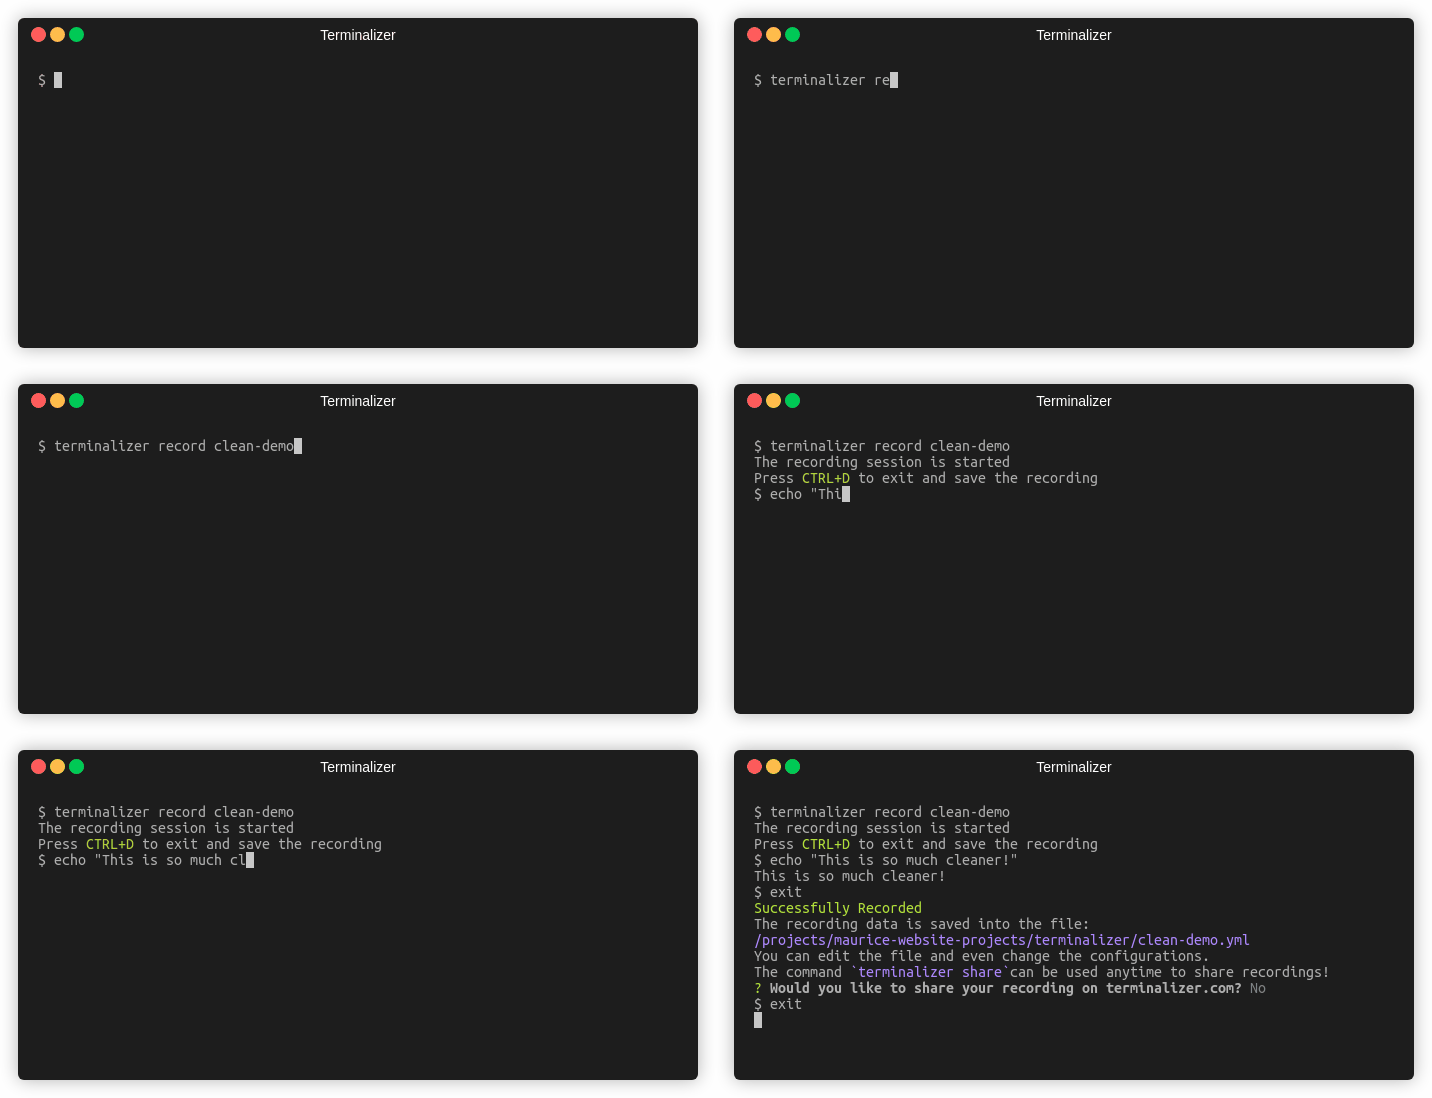
Personally I’m rather annoyed by the long prompt in recordings (I showed you the default behavior on purpose above) and looked for a way to get rid of that during recordings without being forced to edit the recording afterwards.
I’m talking about the maurice@TheCloud:/projects/maurice-website-projects/terminalizer$ line before every command.
On Unix-like systems this prompt is controlled via the PS1 environment variable.
To update it, we need to set the environment variable during our recording.
If you’ve take a look at the default configuration you’ll see that, there is an env section for additional environment variables.
Unfortunately that doesn’t work for us, because they will be overwritten by the defaults set by bash.
That’s why we need to use a trick to achieve the desired behavior. We customize the command, which will be executed when our recording starts like this:
Entry in ~/.terminalizer/config.yml:
command: bash --rcfile ~/.terminalizer/bash_init
This means that bash will source the ~/.terminalizer/bash_init file which looks as follows after it reads the default variables.
source $HOME/.bashrc
PS1="$ "
This way we change the PS1-prompt to just a dollar sign, which is a lot cleaner.

Conclusion
In this article I gave you an overview about Terminalizer, a tool that lets you record, edit and render things that happen in your terminal.
Hopefully this has been helpful. I’d love to get constructive feedback and questions via Twitter (@maurice_brg) or any of the other social media channels listed below.
References
- Code on Github
- Title image courtesy of Kevin Grieve on Unsplash.
