Recently I recorded the video for my talk at the German AWS Community Day 2020. After submitting it, I got the kind feedback, that it would be a good idea, to raise the volume a little bit. I had used OpenShot to edit the video and hadn’t really paid much attention to the audio until this point, so I did what any IT person does, when faced with a problem: I googled.
Most of the results were trying to either sell or promote a software with a pretty GUI. I’m a big fan of open source so I said thank you, no thank you and scrolled a little further down. Somewhere down the list I came upon this question on the video production stack exchange. The author of the response suggested using ffmpeg to first separate the audio track from the video, edit it with Audacity and the stitch them back together. I had planned to try out Audacity for some time, but didn’t really have a use case so far, so I decided that this was the way to go for me.
First I had to get Audacity and ffmpeg installed though.
With Audacity that’s very easy - you just download the installer from their website and run it.
For ffmpeg there are different ways to achieve that.
I just went to their website, clicked the link to the latest windows binaries and downloaded the zip archive with the latest version.
Ffmpeg is a command line tool.
To use it, you should store it somewhere that’s in your PATH environment variable.
In my case I was lazy and just extracted it to my download directory.
Then I copied my video file there, to make things easier, and used this command to take the audio content of the video and store it as a separate .wav file.
ffmpeg -i input.mp4 sound.wav
That process was simple and fairly quick.
I was a little surprised about the size of the file, as my original video was about 1.9 GBs in size and the sound.wav had about 450MB.
I guess this was a result of me choosing a high audio quality on the export setting in OpenShot.
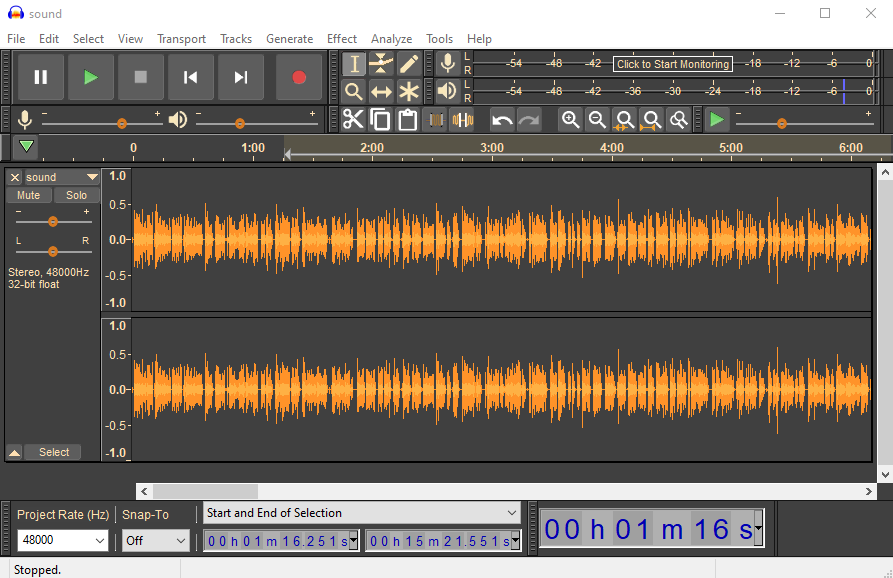
Then I opened Audacity and used drag and drop to import the file.

Now it was time to raise the volume a little. After googling again I found the official documentation and it turns out that this is a very simple process.
- Select the whole clip using
Ctrl+A - Open the menu
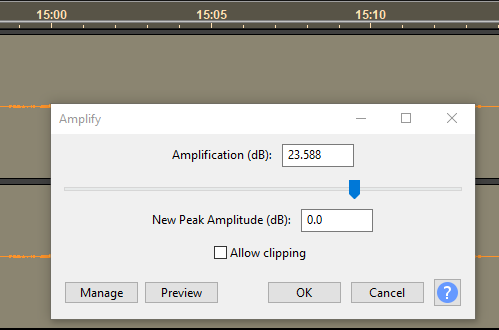
Effectand click onAmplify - You can customize the decibels you want to amplify the sound by - I just went with the default, which seems to be picked based on the volume.
- If you want, you can use the preview button to get an audio preview from a part of the file.
- Once you’re satisfied, you can hit
OKto apply the effect to the whole file.
In my case this worked very well. The problem with amplification is, that everything is amplified - even the annoying background noises, you’d rather not hear. So I once again consulted my dear friend google, to find out, how to reduce that noise. Again the documentation helped.
Essentially you pick a part of your audio file, where there is only noise audible.
You can use Ctrl and the scroll wheel to zoom in and get a better look at the waveform, to find the more quiet parts.
Then you can go ahead and select one of the parts, where there’s only the background noise you want to remove.
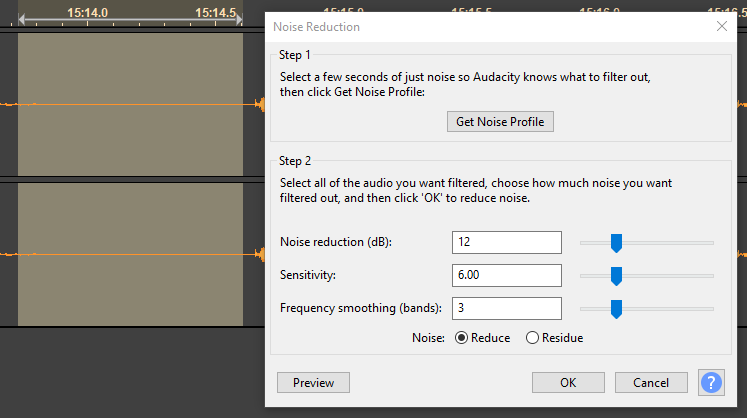
Afterwards you’ll want to go to Effect and click on Noise Reduction.
Since you’ve already selected the noisy part of your clip, you can click on Get Noise Profile.
The dialogue will close after processing for a short while, but don’t worry, the result of the analysis has been saved.
Once that is done, you can select the whole clip with Ctrl + A and click on Effect and Noise Reduction again.
You’ll notice that the numbers have most likely changed.
If you want, you can use the preview functionality to get an idea, how the file will sound like after the changes.
When you’re satisfied with the results, you can just click on OK to apply the changes.
This will probably take a few seconds.

You’ll notice, that the new waveform looks a lot smoother on the lower volumes.

If you’re happy with the result, you can use File - Export - Export as WAV to export the finished file.
Now all we need to do is stich our files back together. We’re going to use ffmpeg for this as again. The command is a little longer this time.
ffmpeg -i input.mp4 -i exported_sound.wav -map 0:0 -map 1:0 -vcodec copy output_video.mp4
If you listen to the output_video.mp4 it should be both louder and clearer now.
Hopefully this has been useful to you!