In the last couple of weeks I have been giving a lot of trainings and also preparing a course on Python at work. The slides for the course are written in Markdown and rendered using pandoc, which works fairly well - although there are some quirks, but I digress. Since it’s a course about Python, it naturally features quite a few code blocks on the slides. Markdown allows you to create a code block with syntax highlighting for Python like this:
    ```python
    # Your code here
    ```
These are a pain to make when using a German keyboard.
For each backtick you need to hit Shift + ´ twice.
Yes, you can also select the text and Shift + ´ three times, but you still need to write python behind the opening tag and this is just not the way I like to work.
I prefer solutions that let me work my way and as a result of that I’m writing this article.
Autocomplete is amazing when writing code and I tried to find out, how I could use this to my advantage. I knew there were lots of code snippet plugins for different languages and I wondered if I could write my own. Fortunately I didn’t even need to, because VS Code allows you to define your own snippets. Now I’m going to show you how to.

First we start by opening the command menu, which is Ctrl + Shift + P on Windows and Linux.
Then you can search for snippets and select Preferences: Configure user snippets.

Now you’ll get the option to choose the language you want to add your snippet for. I chose to make a global snippet, which will be available to me everywhere, since I use markdown not only in traditional Markdown files, but also in Jupyter Notebooks for example. As you can see on the screenshot it’s also possible to make project specific snippets.
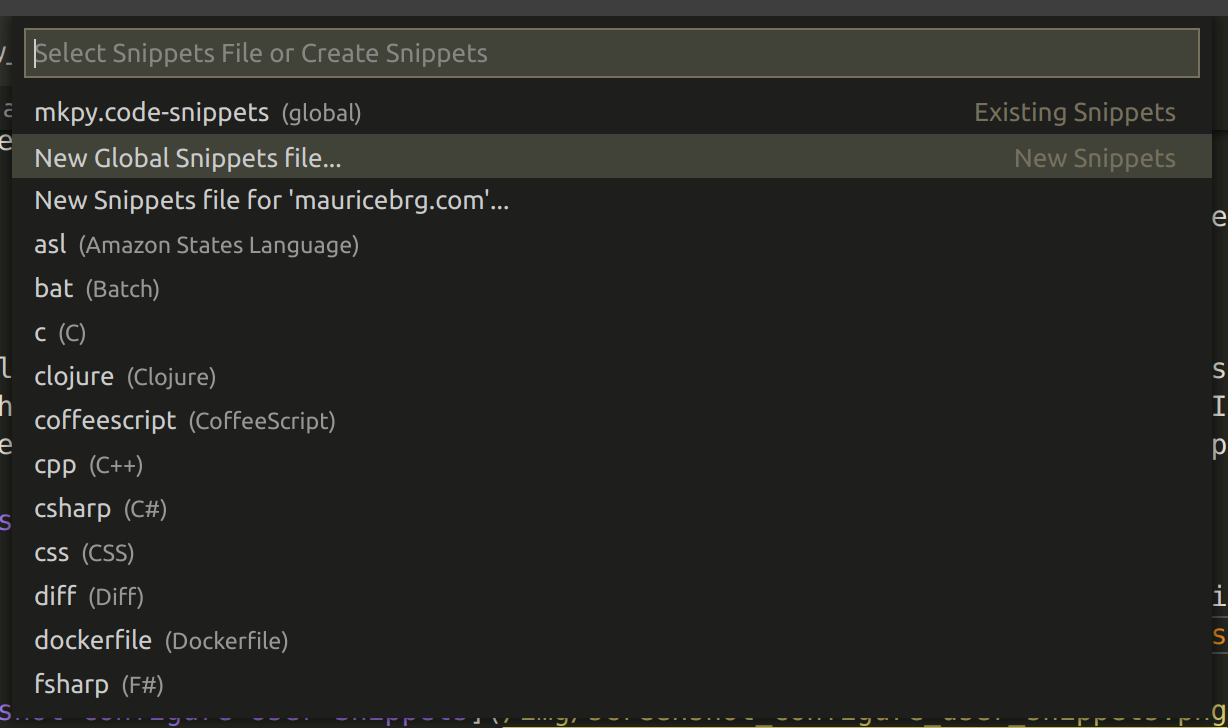
Having selected an option you will be prompted for a file name, which you can choose as you please - descriptive ones are always nice.

It will then open your new snippect configuration, which will look like this. It already contains most of the relevant documentation to get you started, but there is also the official documentation to help you out.
{
    // Place your global snippets here. Each snippet is defined under a snippet name and has a scope, prefix, body and
    // description. Add comma separated ids of the languages where the snippet is applicable in the scope field. If scope
    // is left empty or omitted, the snippet gets applied to all languages. The prefix is what is
    // used to trigger the snippet and the body will be expanded and inserted. Possible variables are:
    // $1, $2 for tab stops, $0 for the final cursor position, and ${1:label}, ${2:another} for placeholders.
    // Placeholders with the same ids are connected.
    // Example:
    // "Print to console": {
    //  "scope": "javascript,typescript",
    //  "prefix": "log",
    //  "body": [
    //      "console.log('$1');",
    //      "$2"
    //  ],
    //  "description": "Log output to console"
    // }
}
So essentially you start with an json object and each key in the object can contain a new code-snippet.
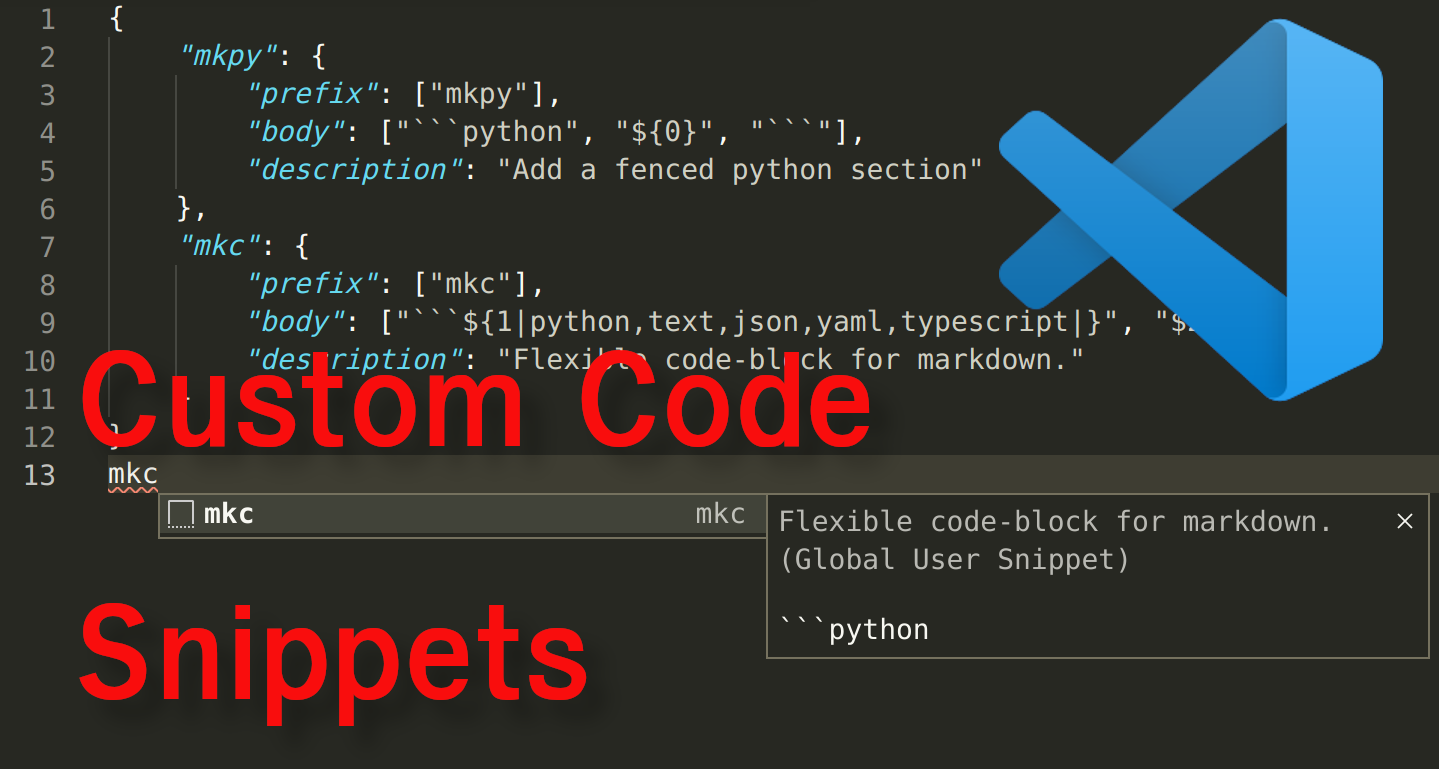
Writing these is fairly easy - here’s the one I used for my mkpy snippet.
The prefix can contain a list of values that essentially trigger this snippet.
The body contains the list of lines that will actually be added when you use the snippet.
The description should be fairly self-explanatory.
{
    "mkpy": {
        "prefix": ["mkpy"],
        "body": ["```python", "$0", "```"],
        "description": "Add a fenced python section"
    }
}
Let’s talk a little more about the body.
As you can see I have the $0 control sequence in there.
This tells VS Code to move the cursor to that position after I added the snippet, which puts it in the middle of the backtick-sequences and allows me to start writing my python code.
You can have multiple of these variables, although $0 is special, it will always be the last position of the cursor.
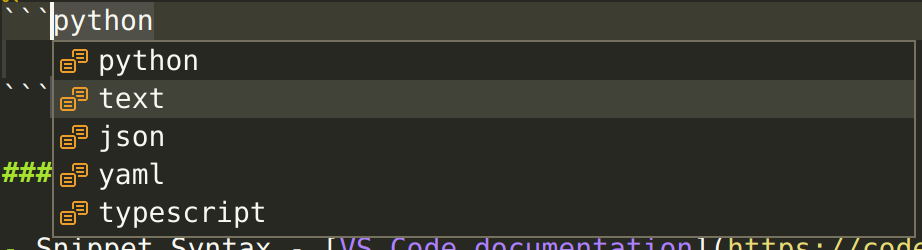
Let’s now look at a slightly more complex example of my code-block snippet.
This one allows me to have a dropdown with the choice of languages for my code block.
The ${1|list,of,values|} format to create a custom dropdown is pretty cool.
I could also use ${1:editable defaul value} to have a default value that can be easily changed.
{
    "mkc": {
        "prefix": ["mkc"],
        "body": ["```${1|python,text,json,yaml|}", "$2", "```"],
        "description": "Flexible code-block for markdown."
    }
}
The selection menu for the language looks like this, but I can also always enter a custom value and use Enter to jump to the next marker, i.e. the content of the code block.
There’s a lot more you can do with these placeholders, but these examples should be enough to get you started.
So how do you trigger the snippet? Easy.
Just enter mkc (or any of the other prefixes) into the editor and Ctrl + Space to trigger autocomplete / IntelliSense and hit enter.
You’ll then be prompted to fill out the values and switch between the different input positions that you’ve defined using the Tab key.
Moving to the position before the current one is simply Shift + Tab.
If you later want to restrict your snippet to a specific language, you can do that using the scope parameter.
This is beyond the scope of what I needed, so I’m going to refer you to the official documentation for that.
Conclusion
In this short post I showed you how to create your own global user snippet for VS Code. Code snippets make it easier to write common structures and creating your own is a useful way to improve and streamline your workflow.
Hopefully you’ve learned something from this article, I’m curious to know which snippets you’ll create. For any feedback on that, questions or other concerns, I’m available on Twitter (@Maurice_Brg) or any of the other social media channels below.
References
- Snippet Syntax - VS Code documentation